 Save
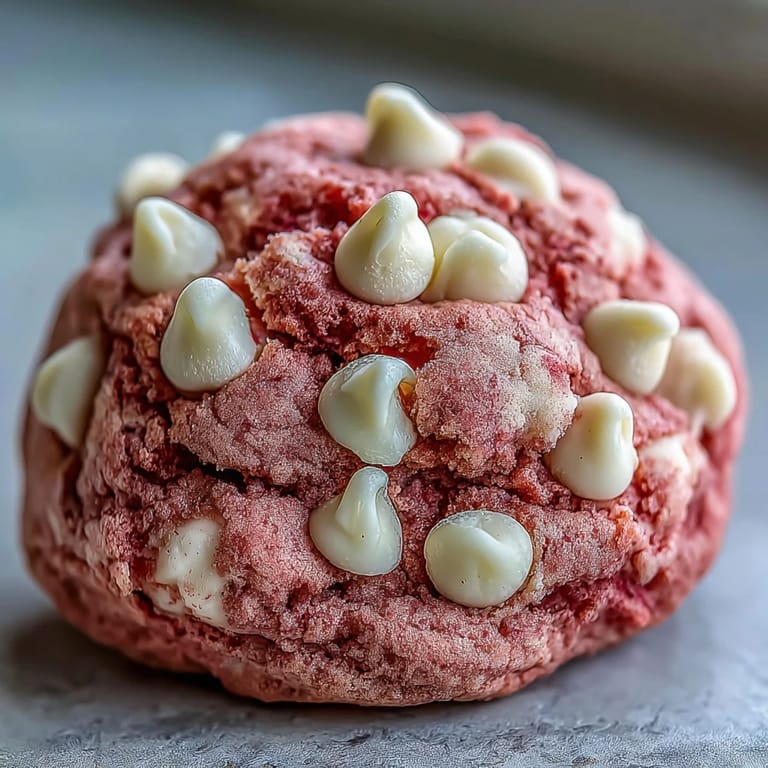
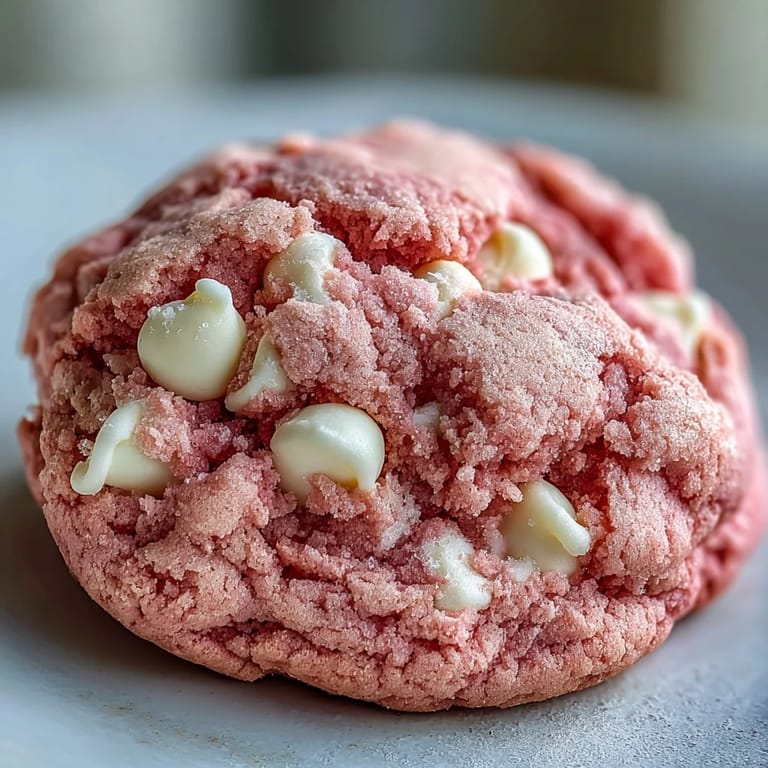
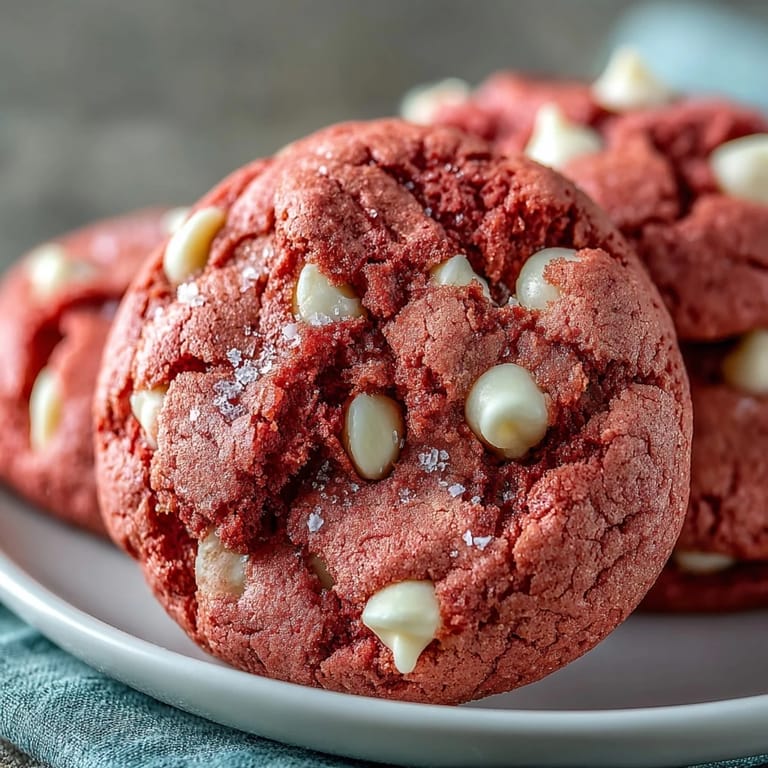
Save My daughter wandered into the kitchen one Saturday morning asking if we could make something pink. Not strawberry, not raspberry—just pink. I laughed, pulled out the gel food coloring I'd been saving, and we ended up with these soft, dreamy cookies that tasted like vanilla clouds with pockets of melted white chocolate. They became our go-to whenever we needed a little color in the day.
I brought a batch to a friend's baby shower, and they disappeared faster than anything else on the table. People kept asking if they were strawberry or if I'd used cake mix, but the secret was just good butter, a little food coloring, and patience to let the dough rest. That chill time really does make them hold their shape beautifully.
Ingredients
- All-purpose flour: The structure of the cookie, whisked with leaveners so every bite is tender but not cakey.
- Baking powder and baking soda: Together they give a subtle lift and help the edges set while the centers stay chewy.
- Salt: Just enough to balance the sweetness and make the vanilla sing.
- Unsalted butter, softened: Creaming it with sugar creates air pockets that keep the cookies light, so let it sit out for an hour before you start.
- Granulated sugar: It dissolves into the butter and gives that slight crackle on top when they bake.
- Egg: Binds everything together and adds richness without making the dough heavy.
- Vanilla extract: Pure vanilla brings warmth and depth that pink color alone cannot provide.
- Pink gel food coloring: Gel is stronger and does not water down the dough like liquid coloring, so start with a little and add more until you love the shade.
- White chocolate chips: They melt into creamy pockets and their ivory color pops against the pink dough.
Tired of Takeout? 🥡
Get 10 meals you can make faster than delivery arrives. Seriously.
One email. No spam. Unsubscribe anytime.
Instructions
- Mix the Dry Ingredients:
- Whisk the flour, baking powder, baking soda, and salt in a medium bowl until evenly combined. Set it aside so it is ready when you need it.
- Cream the Butter and Sugar:
- Beat the softened butter and sugar with a mixer on medium-high speed for two to three minutes until the mixture turns pale and fluffy. This step builds the cookies' soft texture, so do not rush it.
- Add Egg, Vanilla, and Color:
- Beat in the egg and vanilla extract until smooth, then add the pink gel food coloring and mix until the dough is evenly tinted. Adjust the color to your preference by adding a little more gel if you want a bolder pink.
- Combine Wet and Dry:
- Gradually add the dry ingredients to the wet mixture on low speed, mixing just until no streaks of flour remain. Overmixing will make the cookies tough, so stop as soon as the dough comes together.
- Fold in the Chips:
- Use a rubber spatula to gently fold in the white chocolate chips, making sure they are distributed throughout the dough.
- Chill the Dough:
- Cover the bowl with plastic wrap and refrigerate for thirty minutes. This firms up the butter and helps the cookies hold their shape instead of spreading into thin puddles.
- Preheat and Prep:
- Heat your oven to 350°F and line two baking sheets with parchment paper.
- Shape the Cookies:
- Scoop tablespoon-sized balls of dough and place them two inches apart on the prepared sheets. They will spread a bit, so give them room.
- Bake:
- Bake for ten to twelve minutes, until the edges are set but the centers still look soft and slightly underbaked. They will firm up as they cool, so resist the urge to leave them in longer.
- Cool:
- Let the cookies rest on the baking sheets for five minutes, then transfer them to a wire rack to cool completely.
 Save
Save These cookies showed up at my niece's birthday party, and she insisted they tasted like happiness. I realized then that sometimes the simplest recipes become the most memorable, not because of exotic ingredients, but because they make people smile. She still asks for them by name every time I visit.
Decorating and Flavor Twists
I like to press a few extra white chocolate chips on top of each dough ball right before baking so they look bakery-perfect when they come out of the oven. For a subtle floral note, add a few drops of rose water or half a teaspoon of almond extract to the wet ingredients. If you want to turn them into cookie sandwiches, let them cool completely and spread a thin layer of cream cheese frosting between two cookies.
Storage and Make-Ahead Tips
Once cooled, these cookies stay soft in an airtight container at room temperature for up to a week. You can also freeze the dough balls on a baking sheet, then transfer them to a freezer bag and bake from frozen, adding a minute or two to the baking time. I love having a stash ready for last-minute guests or when I just need a bite of something sweet and cheerful.
Substitutions and Dietary Notes
If you need these to be gluten-free, swap the all-purpose flour for a 1:1 gluten-free baking blend and the texture will still be tender and chewy. You can also use dairy-free butter and dairy-free white chocolate chips to make them vegan-friendly, though you will need to replace the egg with a flax egg or applesauce.
- Always check white chocolate chip labels for soy and milk allergens if you are baking for someone with sensitivities.
- For a less sweet version, reduce the sugar by a quarter cup and increase the vanilla slightly.
- If you do not have gel food coloring, you can use natural beet powder, though the color will be more muted and earthy.
 Save
Save These pink velvet cookies have a way of turning an ordinary afternoon into a small celebration. Bake them when you need a little color, a little sweetness, or just a reason to smile.
Recipe FAQs
- → Why is my cookie dough too sticky?
If the dough feels too sticky, it likely needs more chilling time. The 30-minute refrigeration period helps firm the butter and makes the dough easier to scoop. Warm kitchen temperatures can also affect dough consistency—additional chilling in 15-minute increments helps.
- → Can I use liquid food coloring instead of gel?
Gel food coloring works best because it provides vibrant color without adding excess liquid to the dough. Liquid coloring may alter the texture and require adjusting flour amounts. If using liquid, start with drops and increase gradually.
- → How do I know when the cookies are done?
The cookies are ready when edges appear set but centers still look slightly soft. They will continue cooking on the hot baking sheet, so removing them while centers look underbaked ensures the final texture remains chewy rather than hard.
- → Can I freeze the dough?
Yes, scoop the dough into balls and freeze on a baking sheet until firm, then transfer to a freezer bag. Bake frozen dough balls, adding 1–2 minutes to the baking time. Frozen dough keeps for up to 3 months.
- → What makes these cookies velvet?
The velvet texture comes from creaming butter and sugar until pale and fluffy, which incorporates air pockets for softness. The balanced ratio of flour to fat creates a tender crumb, while proper mixing prevents tough, dense results.
- → Can I make these gluten-free?
Substitute the all-purpose flour with a 1:1 gluten-free flour blend designed for baking. These blends typically include xanthan gum, which helps maintain texture and structure. Results may vary slightly in chewiness.