 Save
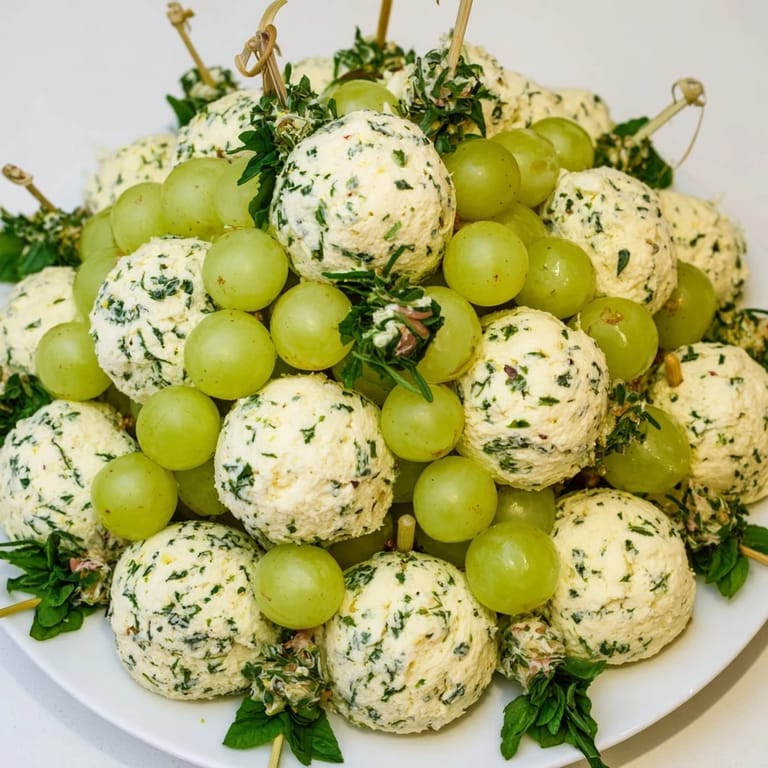
Save I'll never forget the holiday party where my neighbor brought out this stunning edible centerpiece—a gleaming sphere of green grapes, creamy cheese, and herbs that looked almost too beautiful to eat. She caught me staring at it and laughed, explaining it was called a mistletoe kissing ball, and that guests could pluck bites right off the board. That night, I stood by that creation watching people light up as they discovered the tender cheese, the burst of sweet grape, the salty prosciutto tucked between. I knew right then I had to recreate it, and now it's become my signature move at every holiday gathering.
I remember my first attempt vividly—my hands were sticky with cheese, the toothpicks kept sliding, and I was convinced it would look like a sad, lopsided blob. But somewhere around the tenth cheese ball, I found my rhythm, and my daughter came into the kitchen asking if it was food or art. When our guests started circling it like it was the main event (before we'd even opened dinner), I realized I'd stumbled onto something magical: a dish that transforms simple ingredients into a moment people remember.
Ingredients
- Cream cheese, softened (300 g): The foundation of your cheese balls—it needs to be soft enough to roll smoothly but still cold enough to hold its shape when chilled. I learned to leave mine on the counter for 20 minutes while I prep everything else, which saves so much frustration
- Goat cheese (100 g): This adds a subtle tang that makes the cheese balls taste interesting rather than just bland and rich. If it's cold from the fridge, let it soften alongside the cream cheese
- Fresh chives, finely chopped (2 tbsp): The onion whisper that makes people ask what the secret ingredient is—don't skip this or use dried chives, the fresh herb makes all the difference
- Fresh parsley, finely chopped (1 tbsp): Brightens everything up and adds a gentle herbaceous note that grounds the richness of the cheese
- Freshly ground black pepper (1/2 tsp): Grind it right before mixing if you can; it's worth the extra 30 seconds and tastes infinitely better than pre-ground
- Sea salt (1/4 tsp): Less is more here since the prosciutto brings saltiness too—you can always taste and add more
- Green grapes, seedless (250 g): The sweet counterpoint to everything savory; make sure they're dry before assembling or the whole structure gets slippery
- Prosciutto slices, thinly sliced (100 g): Ask the deli counter to slice it paper-thin and don't open the package until you're ready to fold it—it dries out quickly
- Fresh thyme sprigs (1 small bunch): These tucked between the grapes smell incredible and add an elegant, finished look
- Fresh rosemary sprigs (1 small bunch): Slightly woodsy and festive; the longer sprigs work beautifully as visual anchors
- Fresh mint leaves (1 small bunch): A surprising touch of brightness that people don't expect—it makes them pause and really taste what they're eating
- Round wooden or food-safe foam board, 20–25 cm diameter: This is your canvas; a wooden board looks more elegant, but food-safe foam works just as well and is easier to handle
- Small decorative toothpicks or cocktail picks (35–40): These are your structural heroes—angle them toward the center as you go, and they'll hold everything in place like magic
Tired of Takeout? 🥡
Get 10 meals you can make faster than delivery arrives. Seriously.
One email. No spam. Unsubscribe anytime.
Instructions
- Blend your cheese base into silky perfection:
- In a medium bowl, combine your softened cream cheese, goat cheese, chives, parsley, black pepper, and sea salt. Mix gently but thoroughly until the texture is completely smooth—no streaks of white cream cheese left behind, but don't overwork it or it gets greasy. You want it to feel like clouds that hold their shape.
- Roll your cheese balls with care:
- With clean, slightly damp hands, roll the cheese mixture into small spheres about 2.5 cm across—think the size of a large grape or cherry. The moisture on your hands keeps the cheese from sticking as much. You should end up with 18–20 perfect little balls. As you finish each one, place it on a parchment-lined tray and slide the whole thing into the fridge for 10 minutes; this firms them up so they don't collapse when you're securing them with toothpicks.
- Prepare your grapes with intention:
- Wash your grapes under cold water and pat them completely dry with a clean kitchen towel. Any moisture will make them slip around on the toothpicks, so this step actually matters more than it sounds.
- Build your ball on the board with patience:
- Set your round board on a stable surface and begin placing your cheese balls in a circular pattern, securing each one with a toothpick angled slightly toward the center—this creates that lovely rounded shape. Start at the edges and work your way around and up, like you're building a sculpture. Alternate cheese balls with grapes as you go, creating a pattern that guides your eye around the sphere.
- Tuck in the prosciutto with elegance:
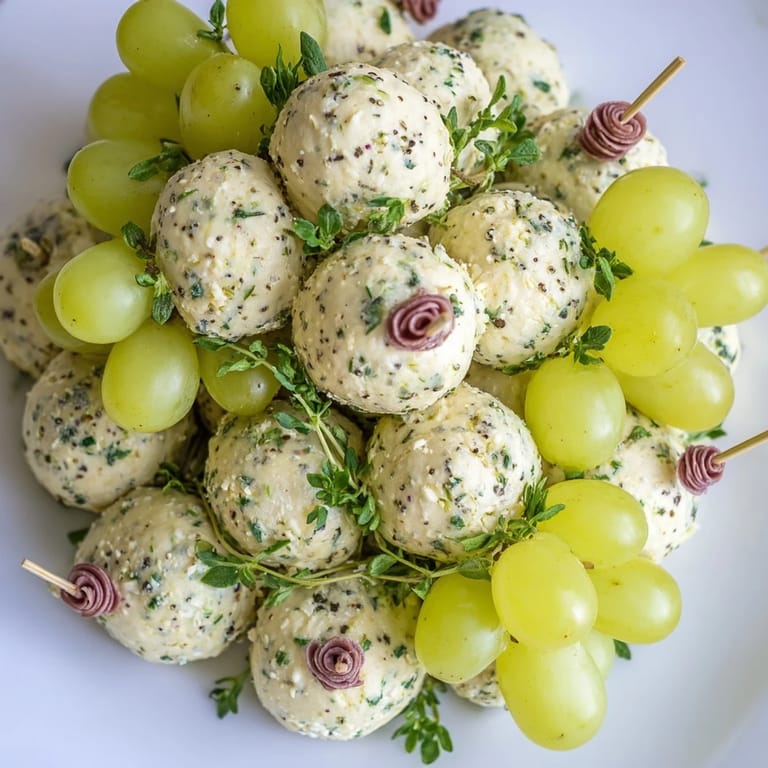
- Take your paper-thin prosciutto slices and fold them gently into rosettes (twisted shapes) or small bundles. Insert these between your cheese balls and grapes, securing them with additional picks. The goal is to see little hints of pink and cream playing peek-a-boo with the green grapes.
- Crown it with fresh herbs:
- This is where it becomes a centerpiece rather than just food. Tuck your thyme, rosemary, and mint sprigs throughout the arrangement, filling any gaps and creating an organic, garden-fresh appearance. Turn the board as you work so you can see it from all angles—it should look equally beautiful from every direction.
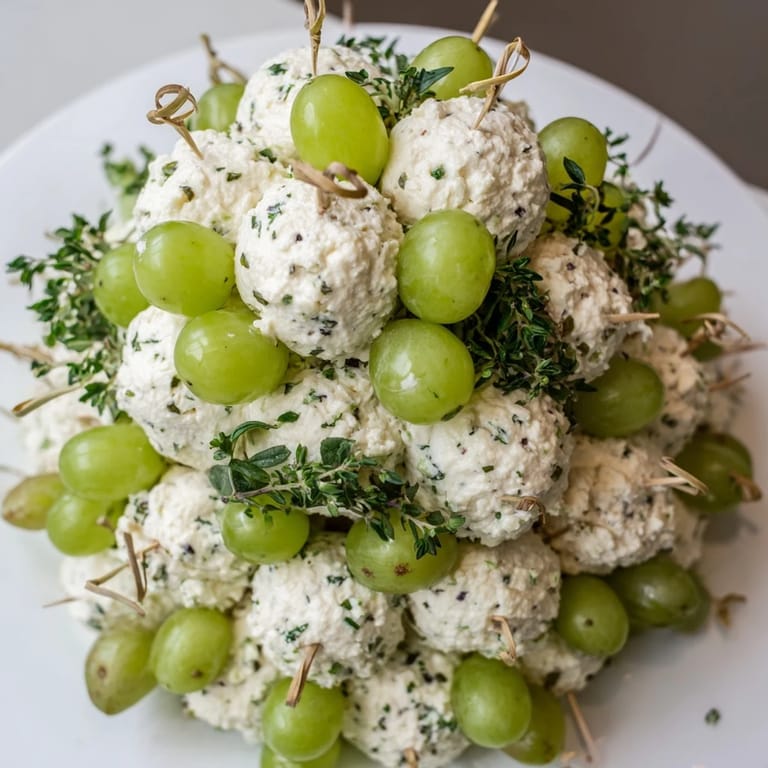
- Fill until the kissing ball is lush and dense:
- Keep building until the round board is almost completely covered and resembles a fragrant, edible sphere. You want people to see it and immediately want to touch it. Once you're satisfied, refrigerate it until serving time—this keeps everything firm and flavors more developed.
 Save
Save The moment that solidified this as a keeper for me was watching a stern-looking guest who claimed not to like cheese take a cheese ball, then reach right back for another. When she asked for the recipe with genuine warmth in her voice, I knew I'd found something special—a dish that breaks down walls and brings people together around something beautiful and delicious.
Making It Your Own
This recipe is more of a template than a rule book. For extra flavor, try rolling some of your cheese balls in crushed pistachios, toasted walnuts, or fresh herb blends before assembly—they add wonderful texture and visual interest. I've also experimented with swapping the prosciutto for smoked salmon (which looks stunning against the green), or leaving it out entirely for a vegetarian version that's equally impressive. The beauty of building on a board is that you can adjust as you go, swapping elements until it feels uniquely yours. Some years I lean into the Italian flavors with extra rosemary and crispy prosciutto; other years I go lighter with more fresh herbs and citrus-touched cheese. Trust your instincts and taste as you build.
Pairing and Serving Suggestions
This is meant to be served as a hands-on appetizer where guests pluck bites directly from the board, so set it on a prominent surface where people naturally gather. The beauty is that it works with nearly any drink—chilled sparkling wine is my go-to because the bubbles cut through the richness of the cheese, but I've also served it with crisp white wines, champagne, or even non-alcoholic options like sparkling cider. Set small plates and napkins nearby because people will want to load up once they realize how addictive these bites are. I also always warn guests that it's heavier than it looks—these little balls are deceptively rich and satisfying.
Timing and Make-Ahead Magic
The cheese mixture can be made up to two days ahead and stored in an airtight container in the fridge, which means you can roll your balls the morning of your party and chill them until assembly time. The only part that truly must happen close to serving is the final assembly—roughly an hour before guests arrive is perfect timing. This gives everything time to chill and the herbs time to perfume the whole creation without letting the grapes start to break down. I've learned through trial and error that anything longer than 6 hours starts to show wear, so if you're hosting an all-day event, consider assembling a second batch mid-party.
- Make the cheese base up to 2 days ahead for maximum flexibility
- Roll cheese balls in the morning and refrigerate until you're ready to build
- Assemble no more than 4–6 hours before serving for the best appearance and texture
 Save
Save Every time I make this, I'm reminded that some of the most impressive dishes are the ones that look complicated but are actually quite forgiving and fun to create. This mistletoe kissing ball has become more than just an appetizer in my kitchen—it's an invitation, a centerpiece, and a conversation starter all rolled into one.
Recipe FAQs
- → What cheeses are best for the cheese balls?
Cream cheese and goat cheese provide a smooth, tangy base that holds well when mixed with fresh herbs and spices.
- → How can I keep the arrangement fresh longer?
Keep the assembled ball refrigerated until serving and cover it with plastic wrap to maintain freshness and prevent drying out.
- → Are there good alternatives to prosciutto?
Smoked salmon works well for a different flavor or omit the meat entirely for a vegetarian-friendly option.
- → Can I prepare cheese balls ahead of time?
Yes, you can prepare and refrigerate the cheese balls separately for up to two days before assembling the centerpiece.
- → What herbs add the best aroma to this dish?
Fresh thyme, rosemary, and mint offer a fragrant hint of greenery that complements both the cheese and grapes beautifully.