 Save
Save There's a particular moment in Tokyo, standing in a small izakaya with a friend, when a simple side dish of butter corn arrived and completely changed how I thought about this humble vegetable. The kernels glistened under the warm light, fragrant with garlic and soy, and I realized that sometimes the most memorable dishes aren't complicated at all—they're just perfectly balanced. That night, I asked for the technique, went home, and have been making it ever since.
I made this for a potluck once, nestled in a small ceramic dish among all the elaborate casseroles and decorated platters, and watched it disappear first. Someone asked for the recipe that night, then another person, and suddenly I was the person known for butter corn. It's funny how the simplest things can become the ones people remember.
Ingredients
- 4 ears fresh corn, husked (or 3 cups frozen corn kernels, thawed): Fresh corn has the best flavor and texture, but frozen kernels work beautifully when corn isn't in season and are honestly just as delicious.
- 2 tablespoons unsalted butter: This is your flavor foundation, so use real butter—it creates that foamy, nutty base that makes everything taste richer.
- 2 cloves garlic, finely minced: Mincing finely ensures the garlic distributes evenly and melts into the butter rather than catching and burning.
- 1½ tablespoons soy sauce: The secret ingredient that adds depth and saltiness, balancing the corn's natural sweetness beautifully.
- ½ teaspoon freshly ground black pepper: Fresh ground pepper gives a subtle bite that ties everything together.
- Pinch of sea salt (optional): Taste as you go—you might not need this depending on your soy sauce brand's saltiness.
- 1 tablespoon chopped scallions (optional): A fresh finish that adds color and a mild onion brightness.
- 1 teaspoon toasted sesame seeds (optional): These add a nutty crunch and are worth the tiny effort of toasting them dry in a pan for a minute.
Tired of Takeout? 🥡
Get 10 meals you can make faster than delivery arrives. Seriously.
One email. No spam. Unsubscribe anytime.
Instructions
- Cut the corn:
- Stand the ear upright on your cutting board and slice down with a sharp knife, rotating as you go—the kernels will tumble off cleanly. Work over a bowl to catch any juices.
- Melt the butter:
- Heat your skillet over medium and watch the butter foam up. That foamy stage means it's ready for the next step.
- Toast the garlic:
- Add your minced garlic to the foamy butter and let it sit for about 30 seconds, stirring gently, until it smells incredible but hasn't browned. The smell is your timer here.
- Cook the corn:
- Pour in your corn kernels and stir frequently for 4 to 5 minutes, letting them pick up that golden color. You're looking for slight caramelization on the edges.
- Add the soy sauce:
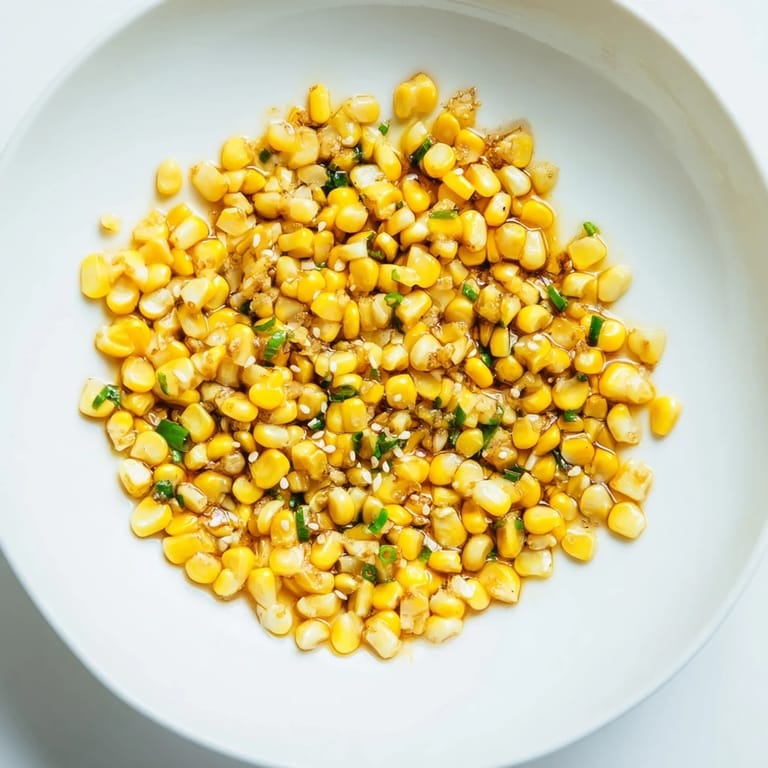
- Pour it in slowly, stirring constantly to coat every kernel. Let it simmer for another minute or so until most of the liquid cooks off and coats the corn like a glossy glaze.
- Season and taste:
- Grind in your black pepper, add a pinch of salt if needed, and steal a kernel to taste. Adjust to your preference.
- Finish and serve:
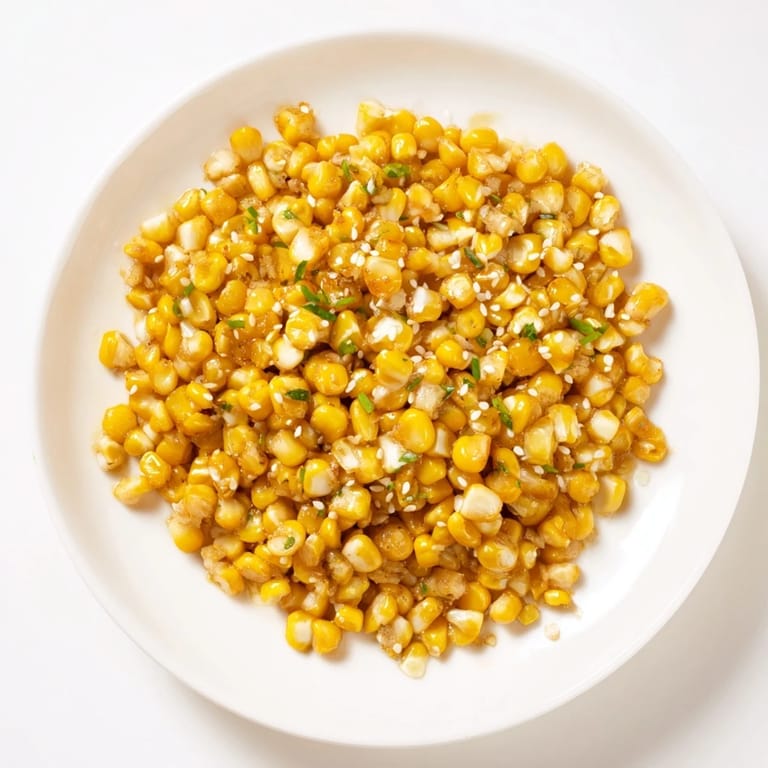
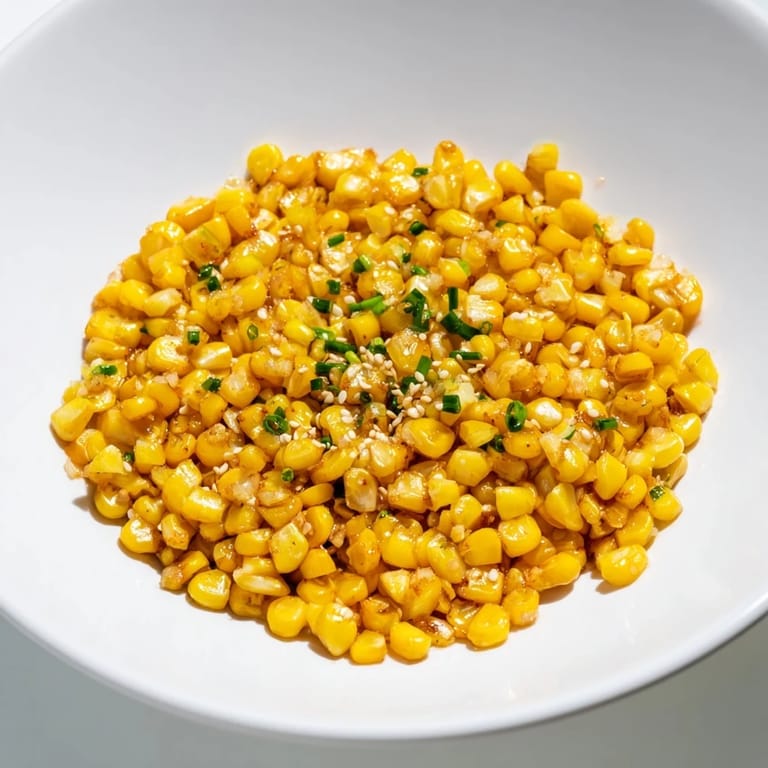
- Transfer to a serving dish while still warm, scatter with scallions and sesame seeds if you're using them, and serve immediately.
 Save
Save I've learned that the best meals don't need to be complicated, and this dish taught me that sometimes the most generous thing you can do in the kitchen is show up with something simple and done well. It's the kind of side that makes people feel cared for without any fuss.
Fresh Versus Frozen
I used to think frozen corn was a compromise, something you reached for when fresh wasn't available. But I've changed my mind—frozen corn is often picked at peak ripeness and frozen immediately, sometimes tasting sweeter than fresh corn that's been sitting in the grocery store for days. The technique is identical either way, and you might actually prefer the consistent texture and flavor that frozen brings to this dish.
Why This Flavor Combination Works
The sweetness of corn, the richness of butter, the pungency of garlic, and the savory depth of soy sauce create a harmony that feels almost too simple to be true. The soy sauce doesn't make it taste Asian so much as it amplifies all the other flavors, pulling them into focus. It's the same reason a pinch of salt makes a dessert taste sweeter—the soy wakes everything up.
Serving and Storing
This dish is best served immediately while the corn is still warm and the butter is glossy. But I've also eaten it at room temperature the next day straight from the fridge, and it's honestly still good—the flavors have melded and deepened. If you have leftovers, store them in an airtight container for up to three days, and warm gently in a skillet with a tiny knob of butter if you want that fresh-made taste back.
- Serve alongside grilled chicken, fish, or steak without overwhelming the main event.
- Pile it over warm rice for a simple, satisfying bowl meal.
- Use it as a topping for ramen or other noodle soups for unexpected richness.
 Save
Save This butter corn has become my quiet kitchen victory, the dish I make when I want to remind myself that sometimes the most satisfying food comes from listening to what's in front of you and letting it shine. Make it for someone you care about.
Recipe FAQs
- → Can I use frozen corn instead of fresh corn?
Yes, thawed frozen corn kernels work well and provide convenience without sacrificing flavor.
- → What type of butter is best for this dish?
Unsalted butter is ideal to control seasoning, but you may try plant-based butter for a dairy-free option.
- → How long should I sauté the garlic for optimal flavor?
Sauté garlic just 30 seconds until fragrant but not browned to preserve its delicate aroma.
- → Can I add extra seasoning to enhance the taste?
A pinch of freshly ground black pepper and optional sea salt brighten the flavors wonderfully.
- → What garnishes complement this dish?
Chopped scallions and toasted sesame seeds add texture and a nutty finish to balance the richness.
- → Is this dish suitable for gluten-free diets?
Yes, when using certified gluten-free soy sauce, this can fit gluten-free preferences.